|
- Prepare for other settings after 1st Restart & keep the USB drive connected.
(WARNING: This setup is not recommended for Laptop; laptop has much more hidden components and different from one to another brands)
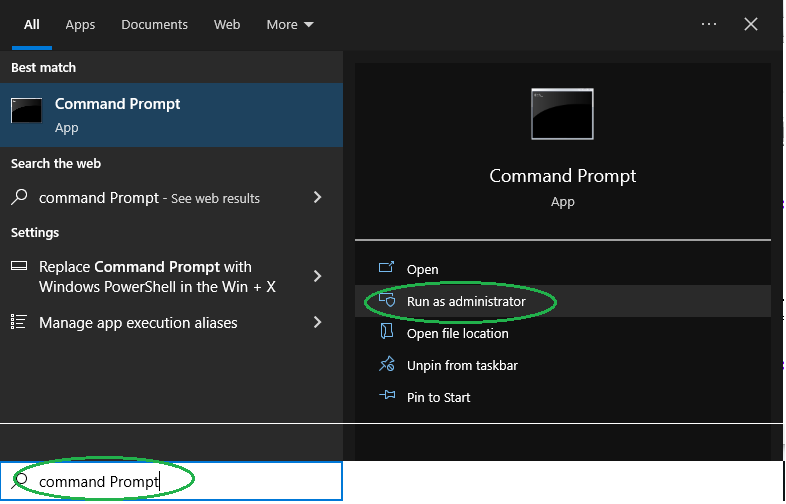
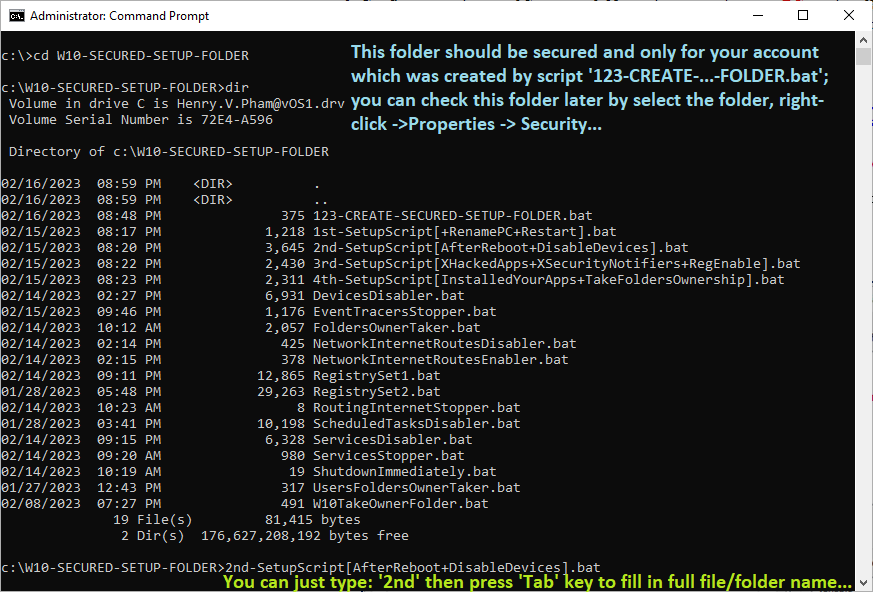
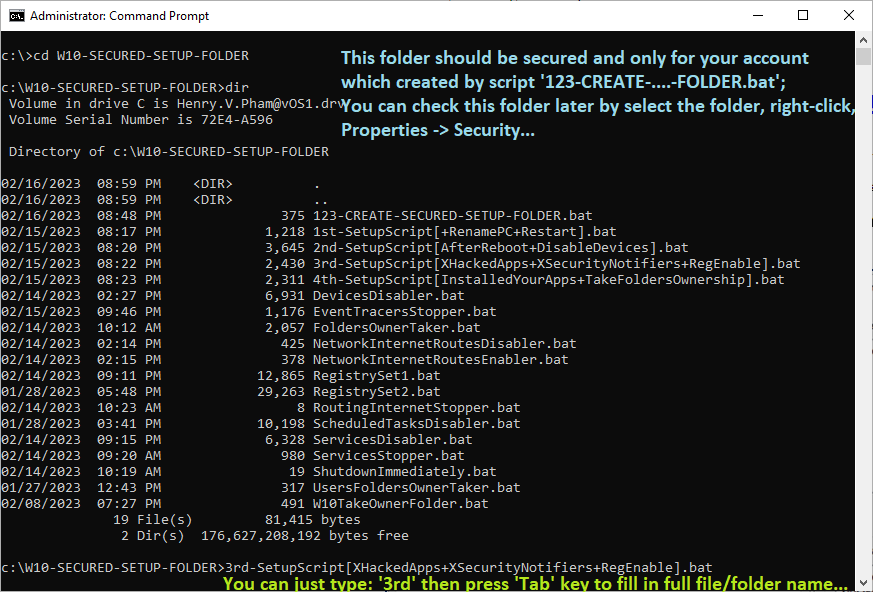
- As soon as you login, Open 'Command Prompt' in Adminstrator mode as shown above and explore to 'C:\W10-SECURED-SETUP-FOLDER'; which already created at 1st login.
- Type the script name: '2nd-SetupScript[AfterReboot+DisableDevices].bat' at 'C:\W10-SECURED-SETUP-FOLDER'; press ENTER to run. (This script will disable devices, networking, stop services)
- Check for unwanted Enviroment Variables again
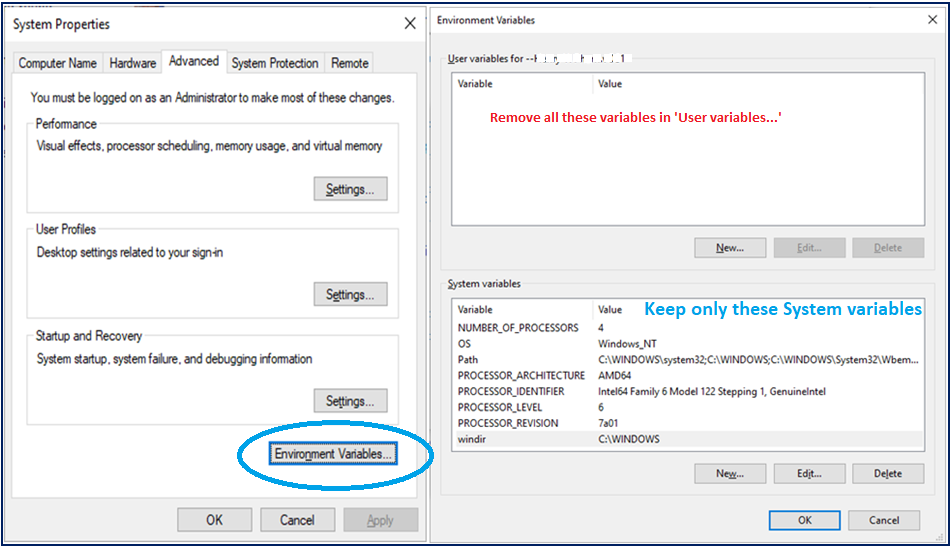
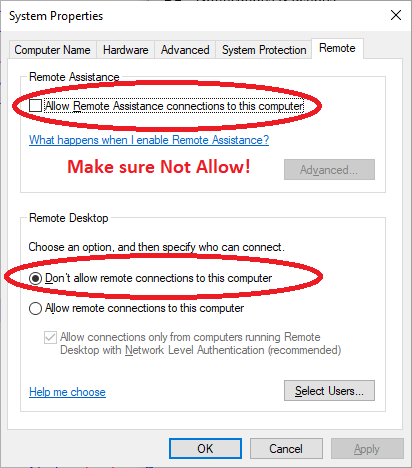
- Next, remove the 'Remote Assistance' option in panel
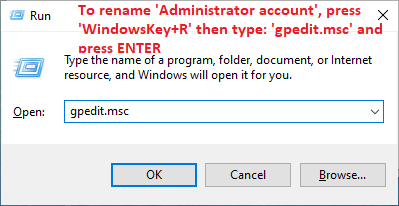
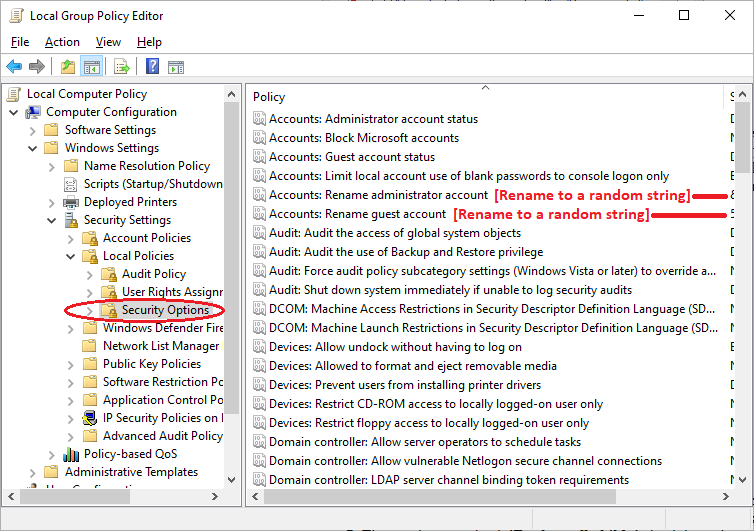
- Rename 'Adminstrator Account' Goto 'Local Group Policy Editor' to rename other unwanted built-in accounts:
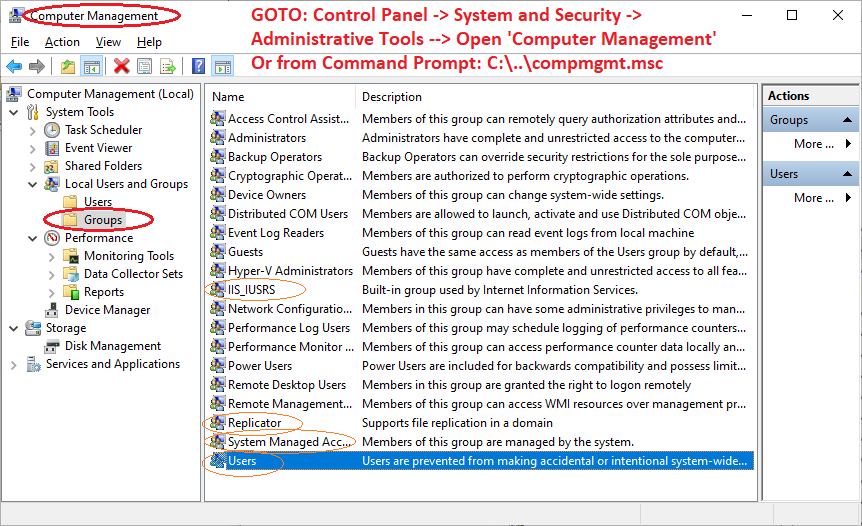
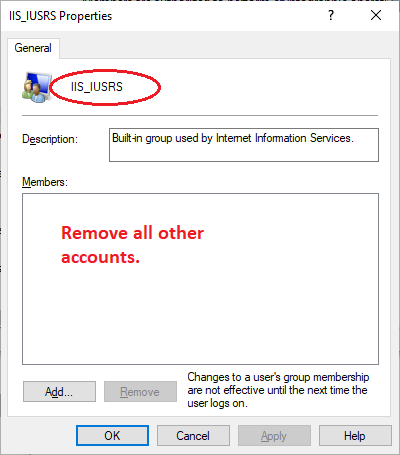
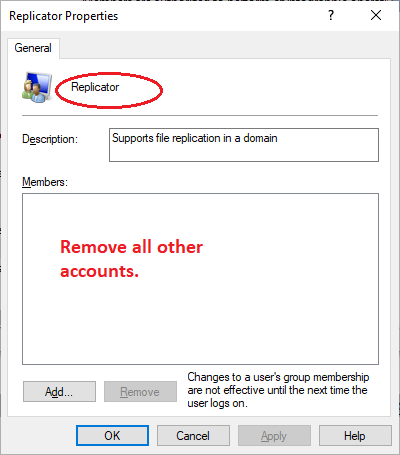
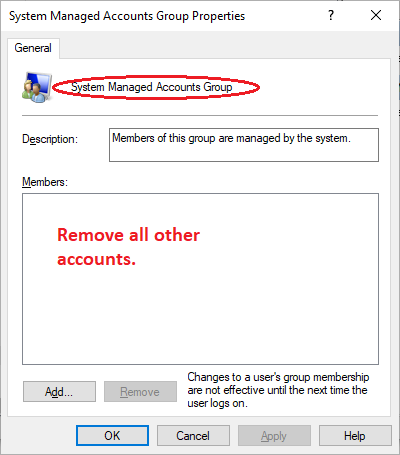
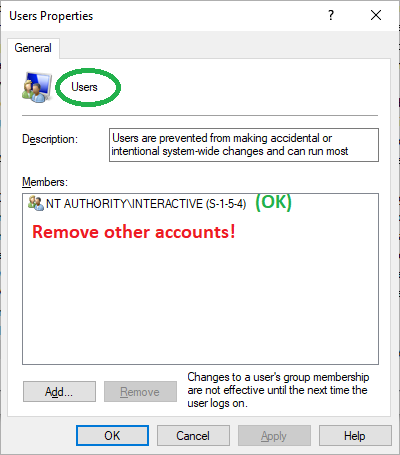
- Goto 'Computer Management' to remove other unwanted accounts:
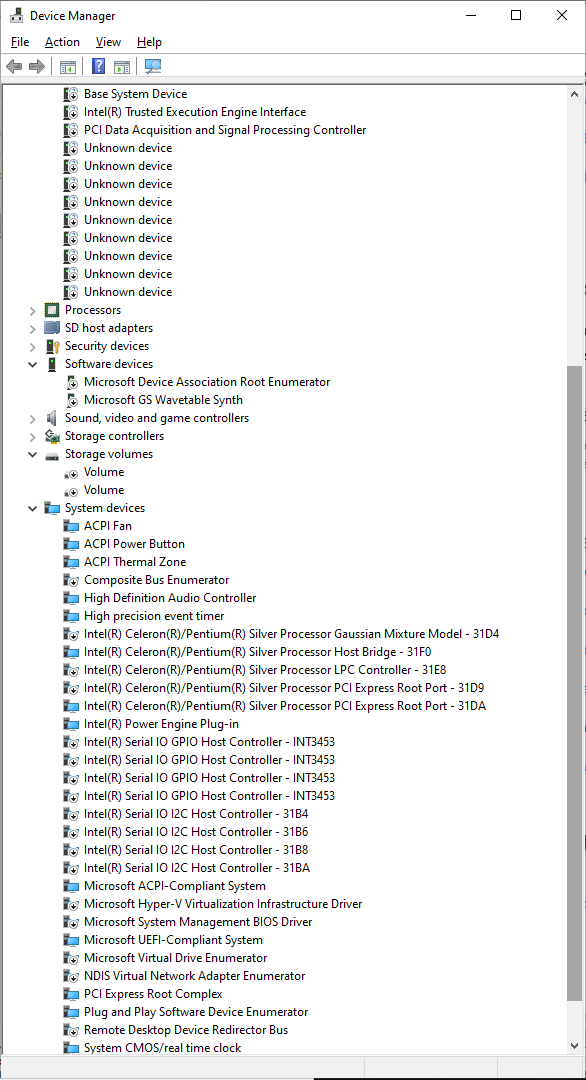
- Next, Goto: 'Control Panel ⇒ System and Security ⇒ System' check and disable the 'Devices' option in Device Manager;
Make sure disable all the 'compliant devices' plus devices that you can able to disable except the current USB device for you key board/mouse.
(If you accidentally disable your USB mouse device, just press ENTER key to open device panel then Tab key to enable button then press ENTER to re-enable)
NOTES: Don't restart computer when Windows askes to when you disabling the devices.
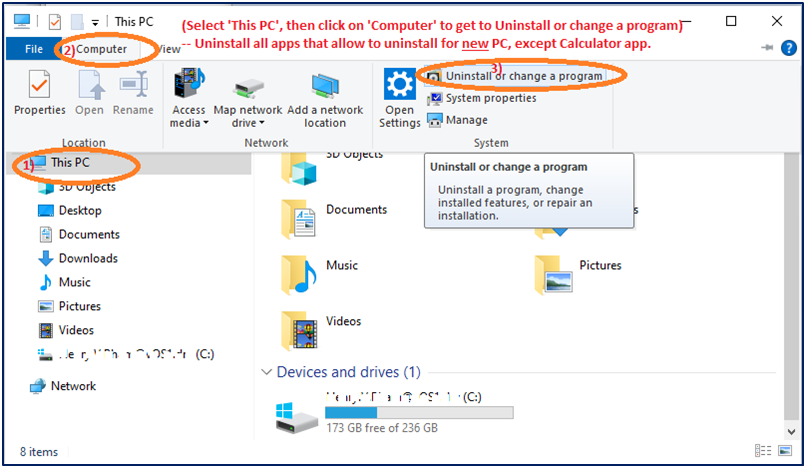
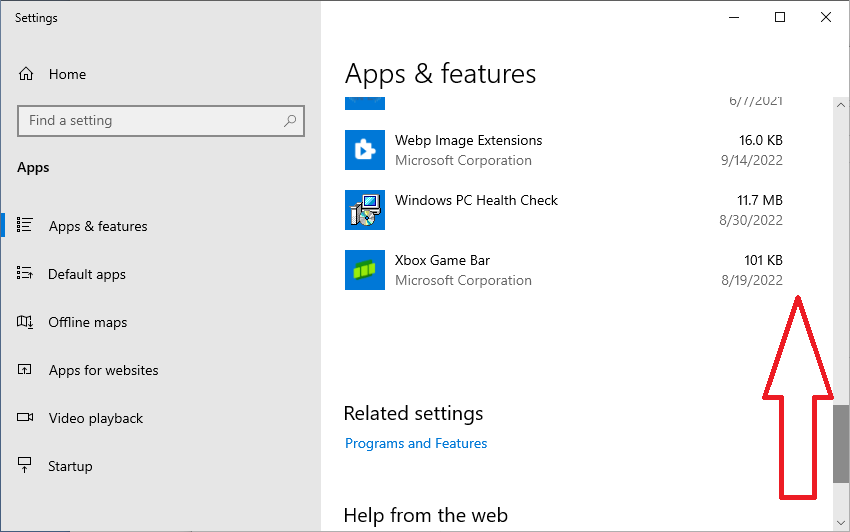
- Next, Uninstall unwanted apps: Normally for new PC (not laptop) you can remove all pre-install apps,
some apps are not allowed to uninstall but can disable running in background (Make sure keep the Calculator app so you can use it later)
(WARNING: This setup is not recommended for Laptop; laptop has much more hidden components and different from one to another brands)
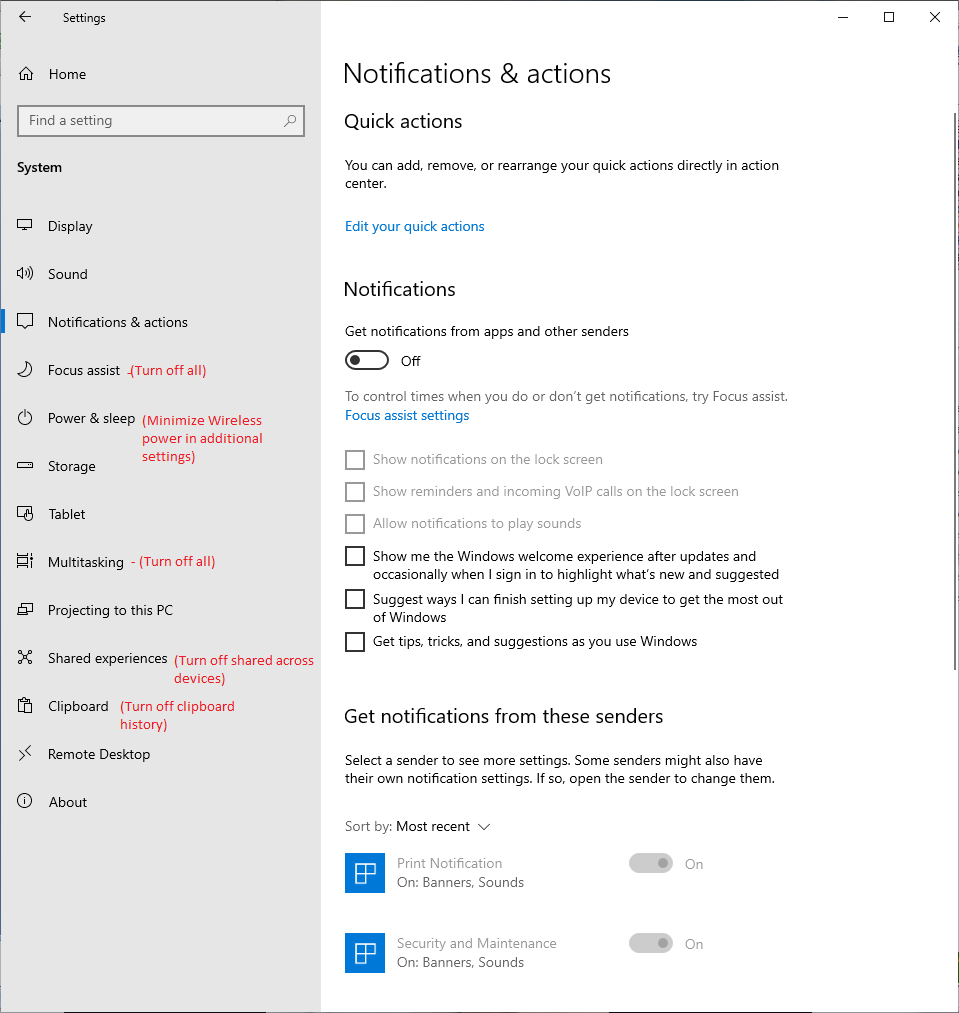
- Disable Windows Notifications: Click on icon below and select 'Manage Notifications'
Select items on the left to disable notifications from this window 'Manage Notifications'
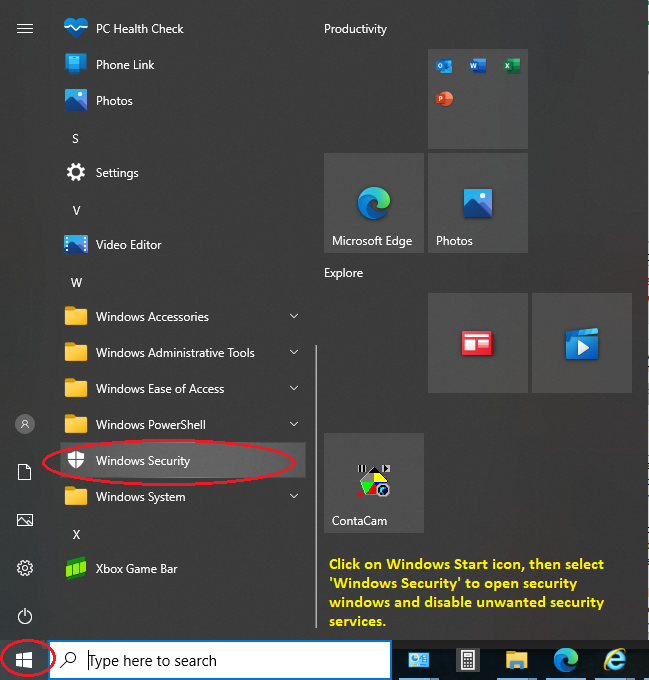
- Disable unwanted Windows Security Services:
Disable Windows Security 'Firewall & NetworkProtection'

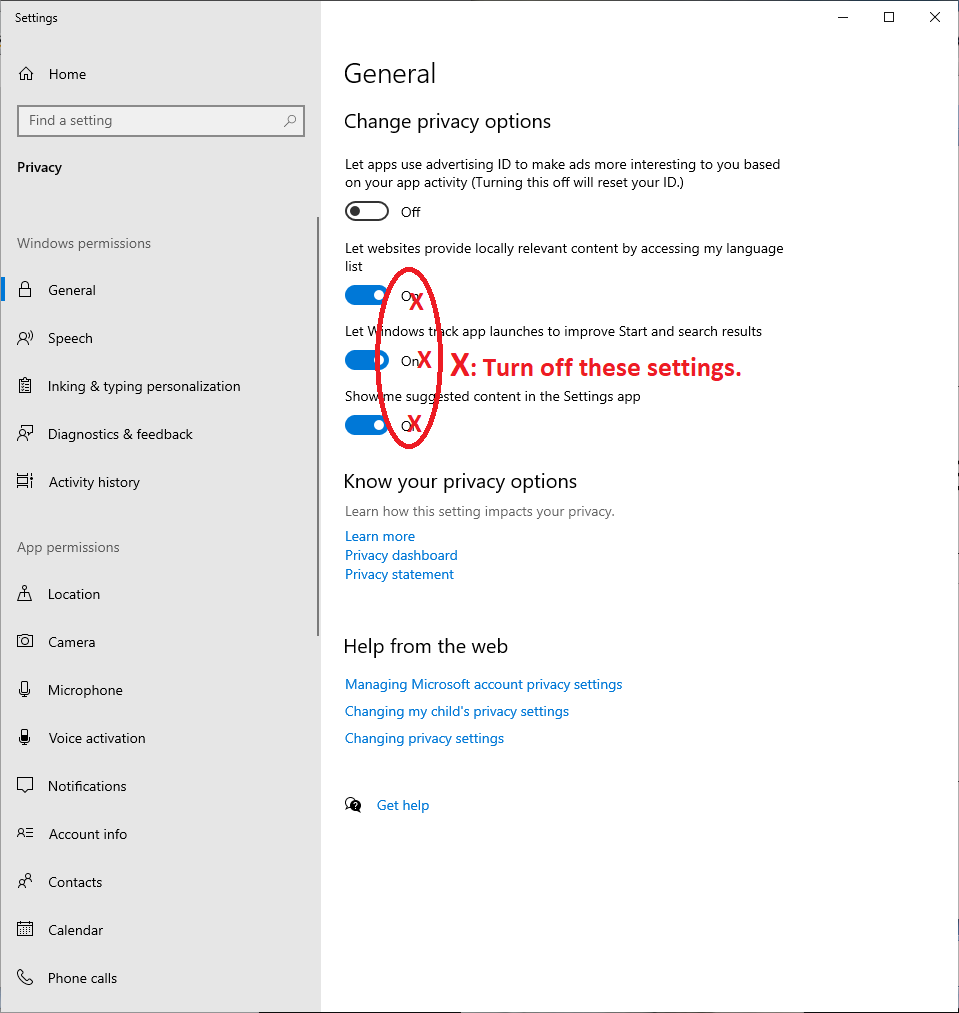
Disable Windows Security 'Privacy Settings General'
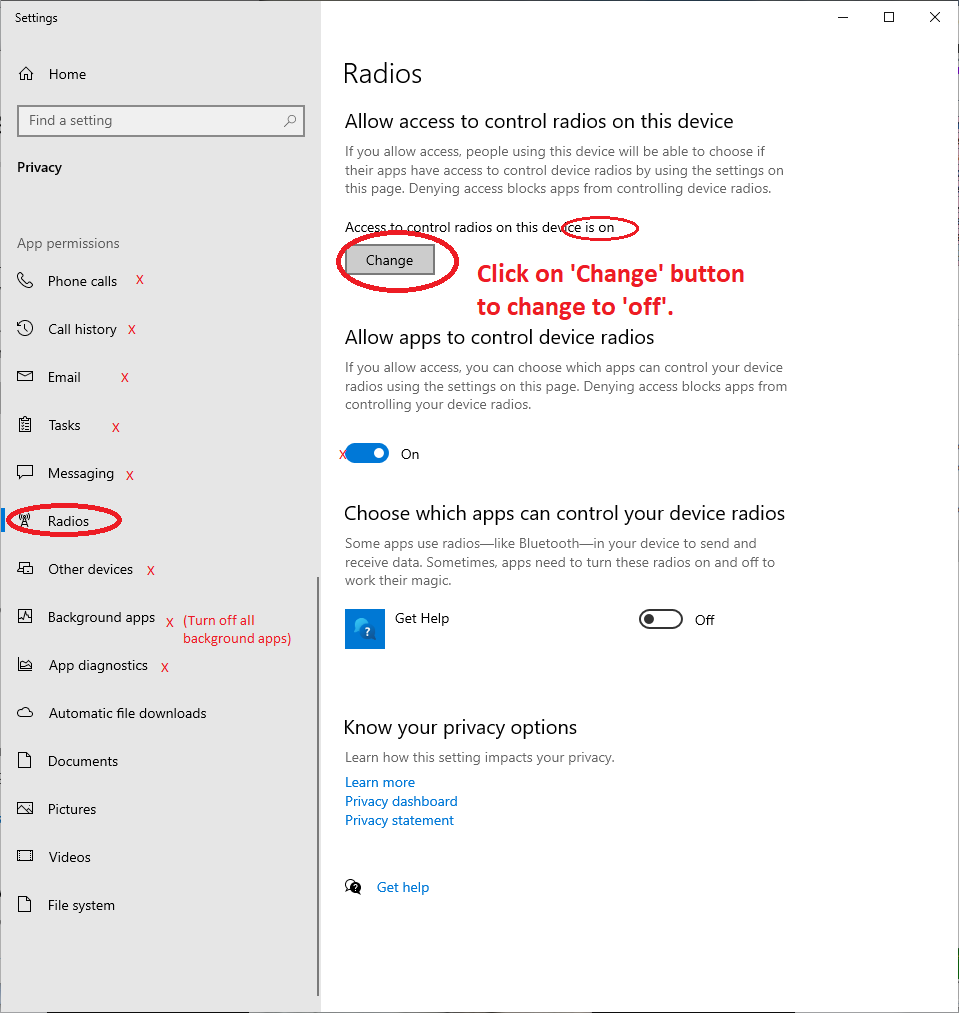
Disable Windows Security 'Privacy Settings Radios'
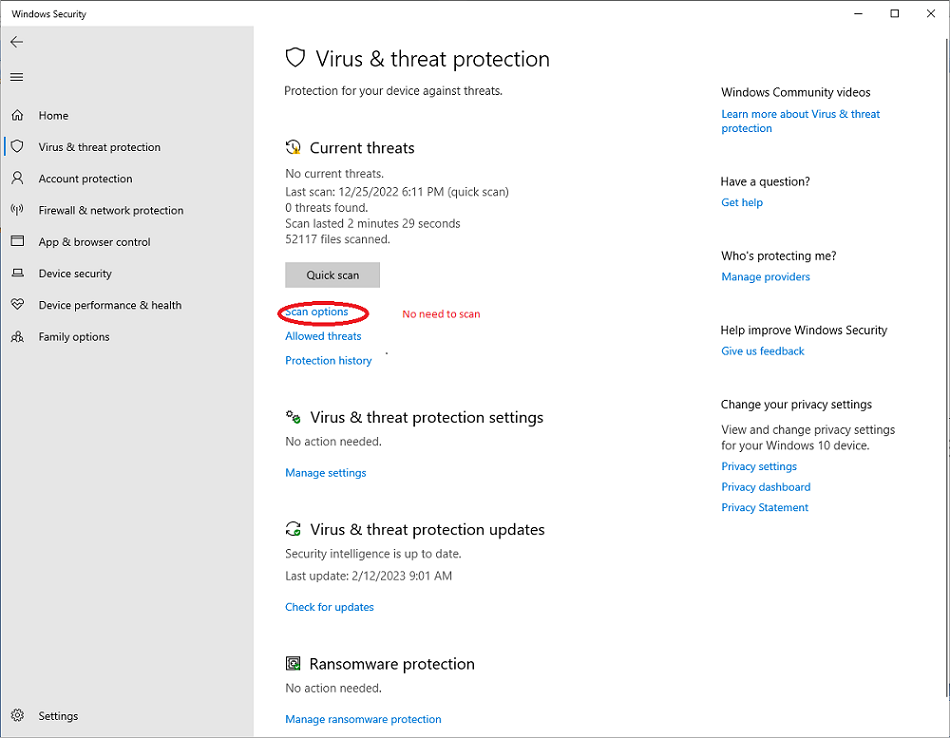
Disable Windows Security 'Virus & Threat Protection'
- Enable hidden Accounts & System Files (Skip this step if you already know, and do it later)
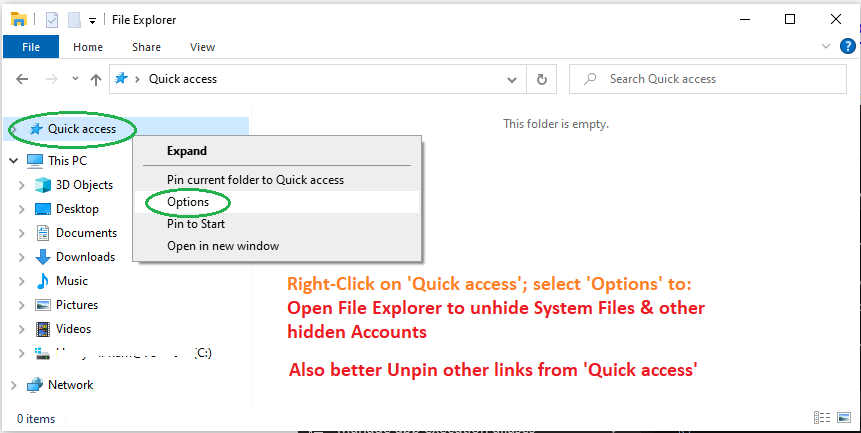
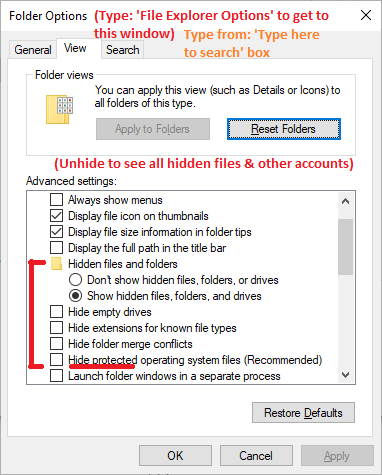
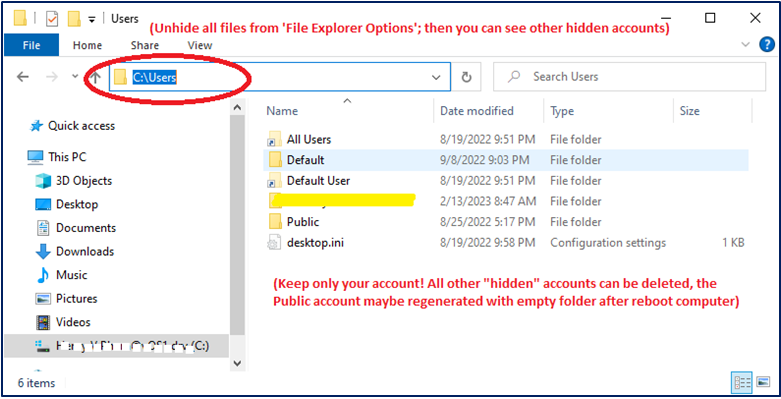
- Unhide the hidden Windows System files to view all other accounts (NOTES: Skip this step if you already know)
- Goto 'C:\Users' folder and checkout all accounts that have been removed by '1st-SetupScript[+RenamePC+Restart].bat' in above step, and make sure only your account is shown. (Skip this step if you already know)
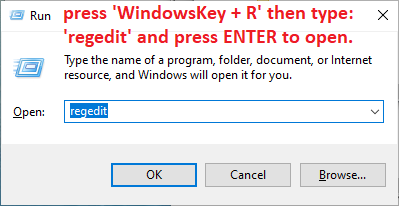
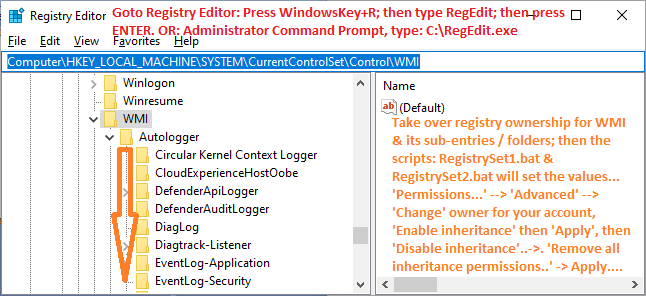
- Next, Registry Settings: To get to Registry Editor, press 'WindowsKey + R' then type: 'regedit' and press ENTER to open.
Explore registry editor for the below 3 main entries then take ownership of these registry entries.
Take over registry ownership do these:
- Select registry entry & right-click.
- Click on 'Permissions...'.
- Click 'Advanced' button from new window.
- Click on 'Change' word on top to change owner.
- Type your account name, click 'Check Name' to make sure correct naming, then click 'OK'.
- Back to 'Advanced Security Settings for..' panel, click 'Disable inheritance' toggle to 'Enable inheritance', then click 'Apply' button.
- Then make sure check 'Replace all child..' check box, then click 'Disable inheritance' and select remove all inheritances.
- NOTES: Some registry entries need to click 'Remove' button to remove other accounts & confirm to remove all.
- Make sure to click 'Add' button to enter your account name when you finally take over the registry entry.
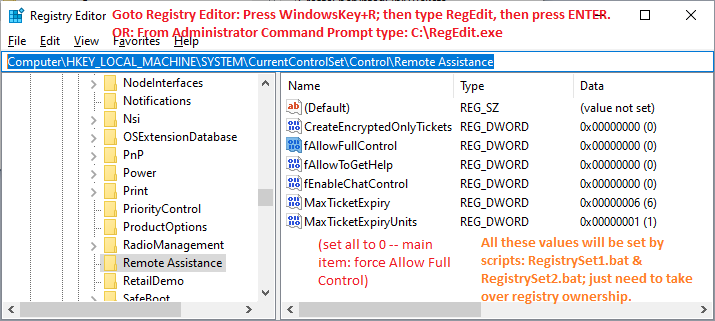
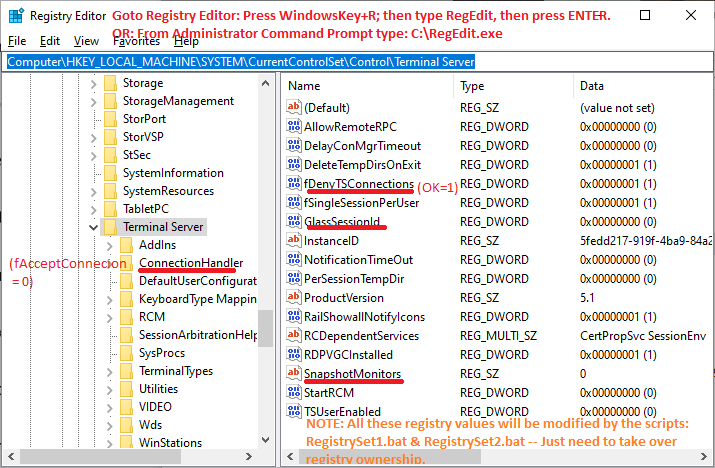
- After taking owership of registry entries, run this script to set/disable unwanted registry settings:
Type this filename '3rd-SetupScript[XHackedApps+XSecurityNotifiers+RegEnable].bat' from the 'Command Prompt' in 'Adminstrator mode' at folder 'C:\W10-SECURED-SETUP-FOLDER'
You can type: C:\W10-SECURED-SETUP-FOLDER\3rd then press 'Tab' key to fill the long name '3rd-SetupScript[XHackedApps+XSecurityNotifiers+RegEnable].bat'; then press ENTER to set registry and other secured settings.
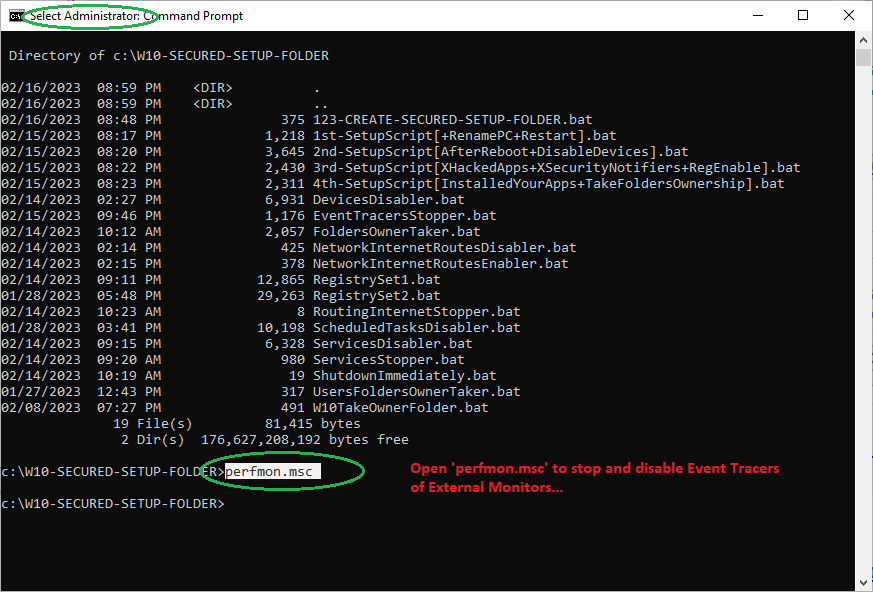
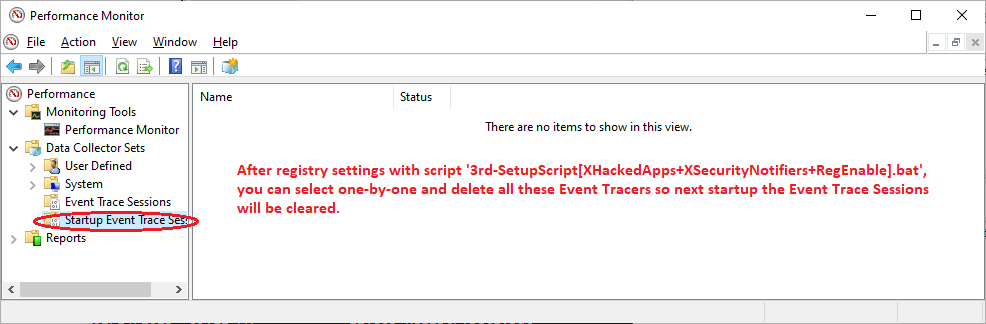
- Now you can stop and delete Event Tracers from 'Performance Monitor':
From Adminstrator Command Prompt, Type: C:\..\perfmon.msc
Stop Event Tracers:
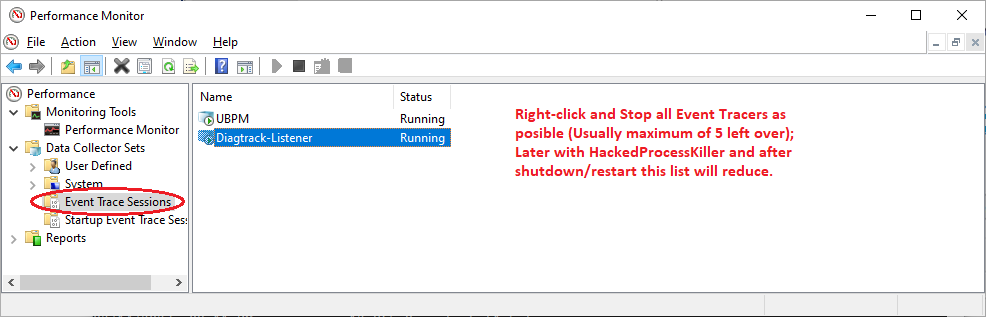
Delete Event Tracers:
- Installing software & applications:
- Install Java JRE to run Java apps from USB device Browse USB drive and Double-Click on 'jdk-6u45-windows-x64.exe' to install.
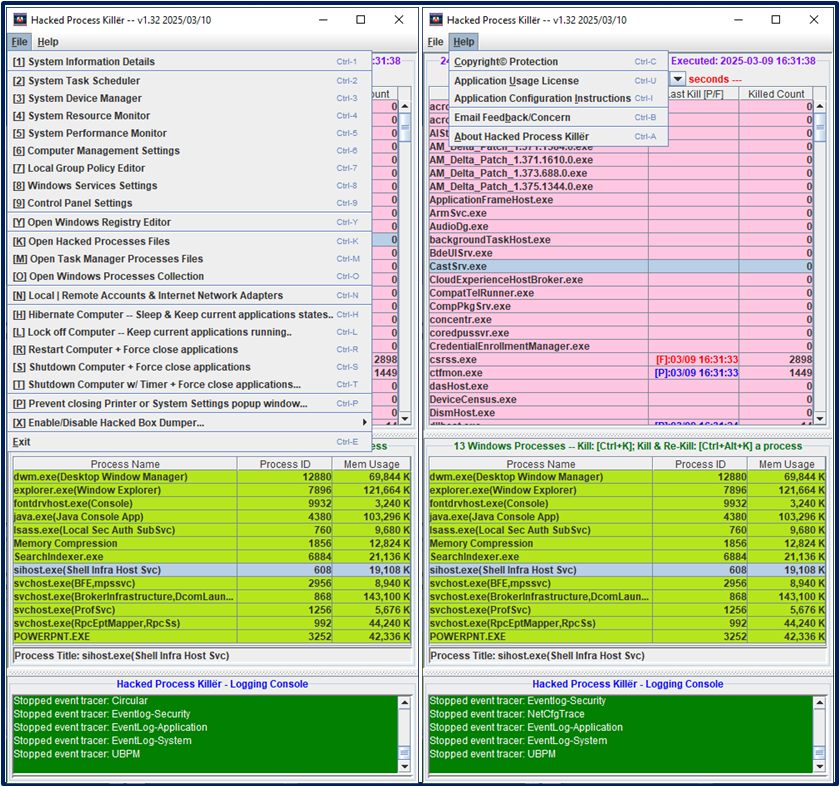
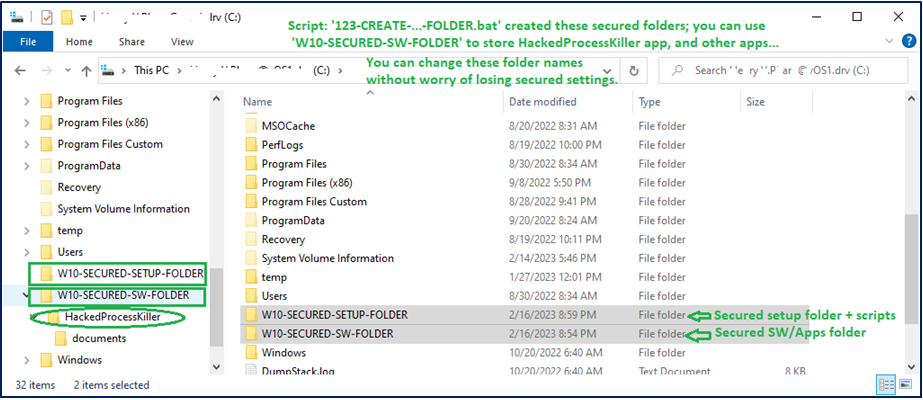
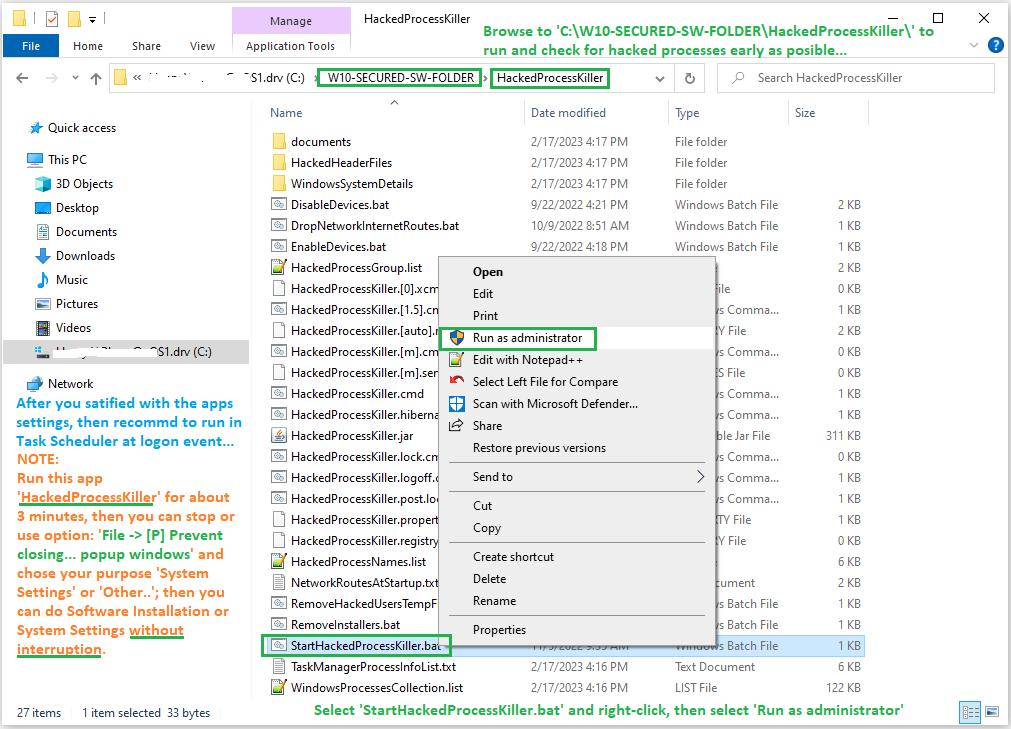
- Start 'HackedProcessKiller' to check for hacked processes by locating 'C:\W10-SECURED-SW-FOLDER\HackedProcessKiller', right-click on 'StartHackedProcessKiller.bat', then select 'Run as administrator'.
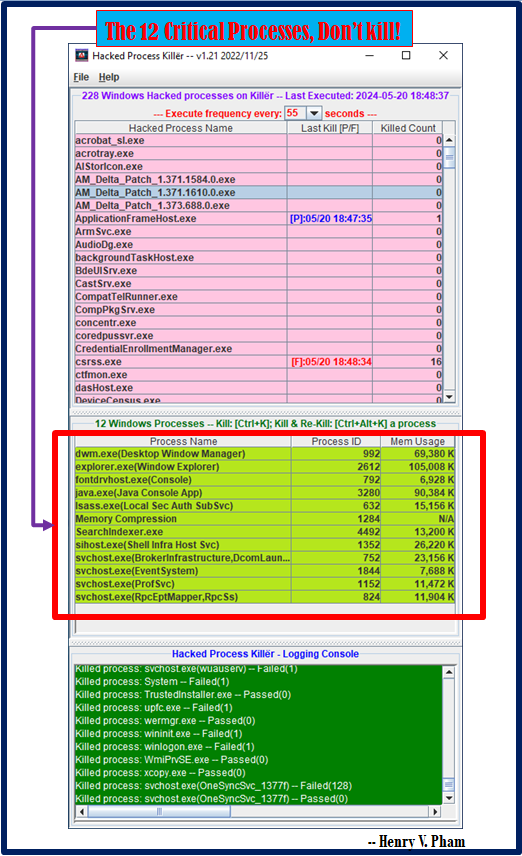
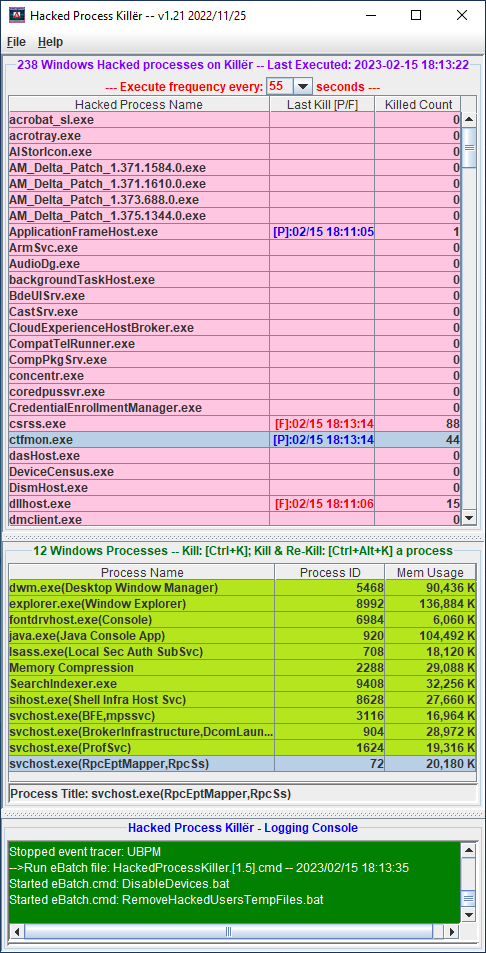
- The HackedProcessKiller with expected view of 12 Windows processes (No other applications' processes showing for new setup PC).
NOTES: you can select other strange processes, right-click and select a kill action.
- To install other software of applications, you should let this app HackedProcessKiller runs for about 3 minutes, then
you can close to prevent installation interference.
- Install other software of applications like usual if you plan what software and applications to be installed.
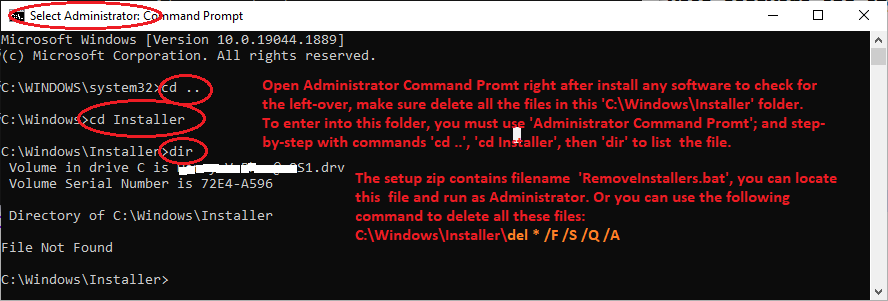
- After complete the Installation of all software and applications, you should delete all the left-over...
- Seal or Protect your applications and folders:
- IMPORTANT: Plan no other software installations -- Then you can run script 'C:\W10-SECURED-SETUP-FOLDER\4th-SetupScript[InstalledYourApps+TakeFoldersOwnership].bat' to protect list of folders show in file 'FoldersOwnerTaker.bat'. You can add more software installed folders into this file as you wish to protect.
- IMPORTANT:Plan for more software installations -- Skip these steps and let 'C:\Users\%USERNAME%' open for more installations. However, you can protect other software/applications installed folder by protect one-by-one with this command from the Adminstrator Command Prompt 'C:\W10-SECURED-SETUP-FOLDER\W10TakeOwnerFolder.bat "[InputFolder]"'
NOTES: [InputFolder] should be in double-quotes to handle spaces.
- Check for each secured folder: Select a folder, do right-click, select 'Properties', select 'Security' tab as shown below.
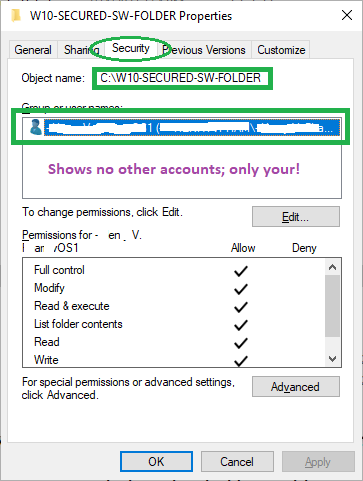
- You can also protect manually: From 'Security' tab, click 'Advanced' button, click 'Change' owner on top window, enter your account, then click 'Disable inheritance' to remove other accounts, then click 'Add' to add your account.
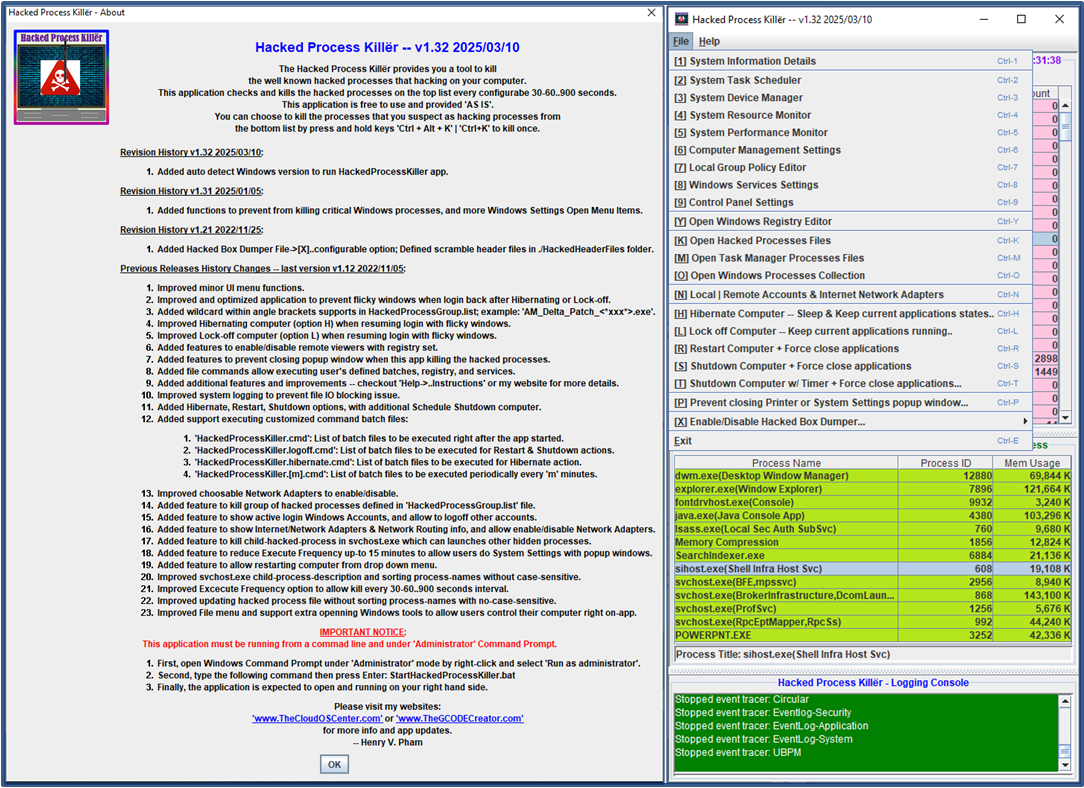
- Finally, setup HackedProcessKiller to run automatically when you login: You can check out further instructions in 'Help' menu and click on 'Application Configuration Instructions'.
|
|